Blender Bottle Cake: Fast, Fun, Minimal Mess (Shaker Cake Hack)
I want cake fast with zero cleanup — and this little trick delivers. Mix batter right in a blender bottle (the shaker used for protein drinks), shake, pour into a mug or mini pan, and heat. It’s single‑serve, low‑mess, and surprisingly delicious. Try chocolate chips or a spoon of jam for a tasty twist.
Shake it up. Pour it out. Enjoy every bite.
- Mix cake batter right in a blender bottle for one serving
- No bowls, no fuss, and barely any cleanup — perfect when you want an one‑bowl style approach
- Microwave for a quick treat or bake in a mini pan for better texture
- Add chocolate chips, jam, or spices for extra flavor
How to Make Cake in a Blender Bottle (Shaker Cake Hack)
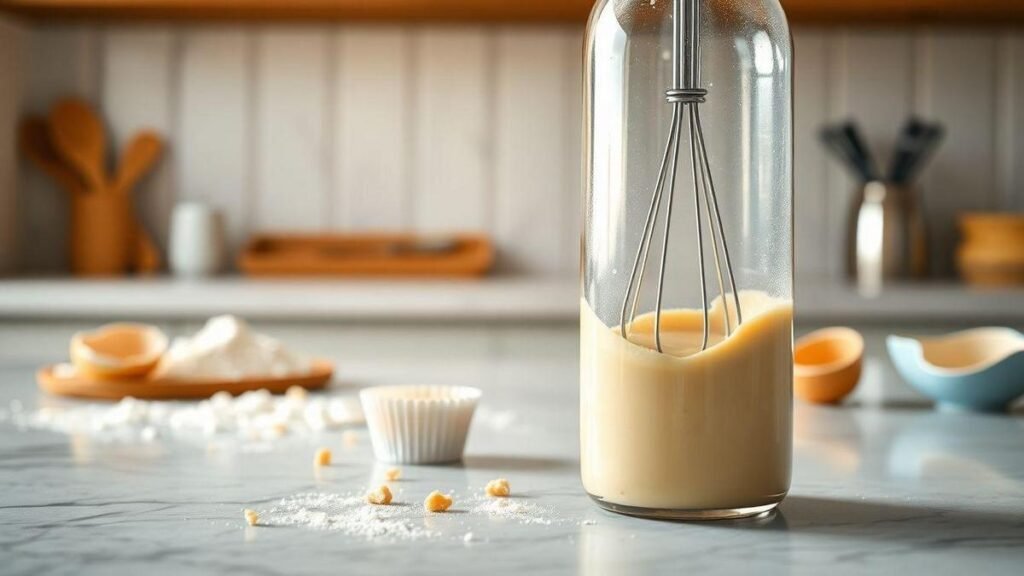
This method uses a blender bottle with a metal whisk ball to mix batter quickly and with almost no mess. It’s perfect when you want a single‑serve cake without washing extra bowls or a mixer — a similar no‑mixer strategy is covered in our guide to making soft cakes without a mixer.
Why Use a Blender Bottle to Make Cake?
- Fast: Mix in seconds — no electric mixer needed.
- Minimal cleanup: Bottle goes to the dishwasher or a quick rinse.
- Single‑serve: Make one cake for one — no big pan necessary.
- Portable: Shake in the bottle, then pour into a mug or mini pan to heat.
What You’ll Need
- Blender bottle (with metal whisk ball)
- Measuring spoons
- Dry ingredients (see recipe)
- Microwave or oven
- Mini cake pan or silicone cup (for oven baking) — or try creative alternatives in how to bake without a cake pan
- Optional: spatula to scrape batter
Basic Blender Bottle Vanilla Cake Recipe
| Ingredient | Amount |
|---|---|
| All‑purpose flour | 4 tbsp (≈32 g) |
| Sugar | 2 tbsp |
| Baking powder | 1/4 tsp |
| Salt | a pinch |
| Milk | 3 tbsp |
| Vegetable oil | 1 tbsp |
| Vanilla extract | 1/4 tsp |
| Egg | 1 small (or 2 tbsp egg substitute) |
Microwave (quick) Instructions
- Add dry ingredients to the blender bottle.
- Add wet ingredients on top.
- Drop in the whisk ball and close the lid tightly.
- Shake hard for 20–30 seconds until smooth.
- Pour into a microwave‑safe mug or ramekin.
- Microwave on high for 60–90 seconds (start at 60s; add time if needed).
- Let stand 1–2 minutes, then enjoy.
Tip: Stop the microwave early — it’s easier to add a few more seconds than to dry out the cake.
Pro Tips
- Use the metal whisk ball — it breaks up lumps fast.
- Don’t overfill the bottle; fill to about half so batter can move.
- Tap the bottle gently before opening to settle batter.
- Grease or spray the mug or cup if baking in the oven to prevent sticking.
- Test for doneness with a toothpick — it should come out mostly clean.
If you want a fluffier crumb without a mixer, see techniques in how to make a soft cake without a mixer.
Flavor Variations
- Chocolate: Replace 1 tbsp flour with 1 tbsp cocoa powder; add chocolate chips.
- Lemon: Add 1/2 tsp lemon zest 1/4 tsp lemon extract.
- Cinnamon: Add 1 tsp cinnamon and a pinch of nutmeg.
- Banana: Mash 2 tbsp banana and reduce milk by 1 tbsp — or try this full easy banana cake recipe for larger batches.
Small mix‑ins (chocolate chips, jam) transform this into a treat.
Toppings & Mix‑Ins
- Chocolate chips: Stir in before microwaving.
- Jam: Spoon into the center for a gooey core — pairing ideas in best ways to add fruit without sogginess.
- Whipped cream: Top after cooling slightly.
- Fresh fruit: Add on top after baking.
- Powdered sugar: Dust for a quick finish.
Oven Baking (If You Prefer)
| Method | Time & Temp | Texture |
|---|---|---|
| Microwave (mug) | 60–90 seconds | Quick, soft, moist |
| Oven (mini pan) | 350°F (175°C) for 12–15 minutes | Slightly firmer, more even crumb |
Pour batter into a greased mini cake pan or silicone muffin cup and bake at 350°F (175°C) for 12–15 minutes for a nicer slice. For other fast bake options using a blender, see bake a cake fast with a blender.
Storage
- Room temp: 1 day — cover to keep moist.
- Fridge: 3–4 days — wrap or store in an airtight container.
- Freezer: Up to 1 month — freeze wrapped; thaw in fridge.
If you plan to add fruit before freezing, read tips in how to make a cake with frozen fruit to avoid excess moisture.
Quick Steps (One‑Line)
- Shake: Mix in the blender bottle until smooth.
- Pour: Into a mug or mini pan.
- Heat: Microwave or bake in the oven.
- Enjoy: Warm or cool, topped as you like.
Conclusion
This blender‑bottle trick is a small kitchen miracle: single‑serving, minimal mess, and surprisingly delicious. Use the metal whisk, don’t overfill, and transfer batter to a microwave‑safe mug or greased mini pan before heating. Try a spoonful of jam, a handful of chocolate chips, or a dash of cinnamon — small tweaks, big payoff. Think of it as a pocket‑sized baker: quick when you’re rushed, cozy when you want a treat.
If you enjoyed this hack, read more easy recipes and tips at Xendrie.
Frequently Asked Questions
Q: Is it safe to make cake in a blender bottle?
A: Yes — but use the bottle only to mix. Most plastic shaker bottles are not microwave or oven safe. Always pour the batter into a microwave‑safe or oven‑safe container before heating.
Q: What kind of blender bottle works best?
A: A wide‑mouth shaker with a tight lid and a metal whisk ball mixes best. Choose BPA‑free plastic or glass for mixing. Avoid metal if you plan to microwave the mug.
Q: Can I microwave the batter in the blender bottle?
A: Only if the bottle is explicitly labeled microwave‑safe. Most are not — safer to pour into a microwave‑safe mug or silicone cup.
Q: How do I bake it in the oven?
A: Shake the batter in the bottle, pour into a greased mini cake pan or silicone muffin cup, and bake at 350°F (175°C) for 12–15 minutes. For more step‑by‑step methods using a blender, see how to bake a cake using a blender. Cool slightly before serving.
Q: What mix‑ins and toppings work best?
A: Small bits work best: chocolate chips, a spoon of jam, sprinkles, cocoa, finely chopped nuts or fruit. Top with frosting, yogurt, whipped cream, or a dusting of sugar. For fruit preparation tips, consult best ways to add fruit to cake.


